Your Guide to Taking Awesome Screenshots

I know how hard it can be to show your website’s visitors, partners or clients a piece of information in a clear, fast and easy way. Screenshots save the day. However, even taking a screenshot can become a nightmare. I’m sure you’ve seen lots of awful screenshots that are tiny low-quality images uploaded to services with lots of ads; it’s distracting and annoying. Today, I’m going to do my best to help you avoid disastrous screenshots like this one:
Finding a Proper Screenshot Tool
I surveyed my colleagues and used the results to create this list of the best screenshot tools approved by Magora’s app development experts. These tools take quality screenshots, are free and offer some advanced functionality:
- Awesome Screenshot
- Nimbus Screenshot available as an extension for Chrome and Firefox
- PicPick
- Fireshot
- Screenshot Captor
- Snipaste
Now that you know the tools, let’s get to the point: how to make quality screenshots.
Saving Screenshots As.webp
When you save a screenshot as a.webp file, the image scales down, which often makes it blurry and unreadable. Pixels and alpha channels are to blame. You can solve this in one click, changing the format when you save the file:
Avoid External Servers
External servers don’t store your screenshots forever - sooner or later, they will expire. My friend once had a very unpleasant experience with one of the tools that store screenshots on internal servers - all her screenshots for an article she was writing vanished while she was editing the text, so she had to go back to square one.
Lesson learned. Upload screenshots to FTP or save them to the computer’s hard drive. This approach has another advantage in that it’s safer in terms of data security.
Hiding the Mouse Cursor
Obviously, if you need the cursor to point to a button one should click, hiding it is pointless. Otherwise, the cursor should not be visible on screenshots.
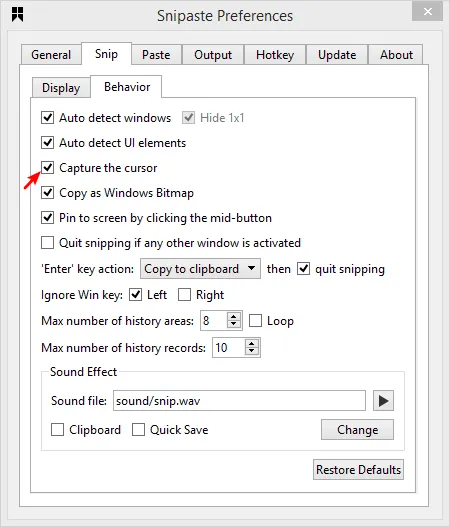
For example, in Snipaste you can hide the cursor by unchecking the box next to “Capture the Cursor” in the preferences menu:
Using Hot Keys
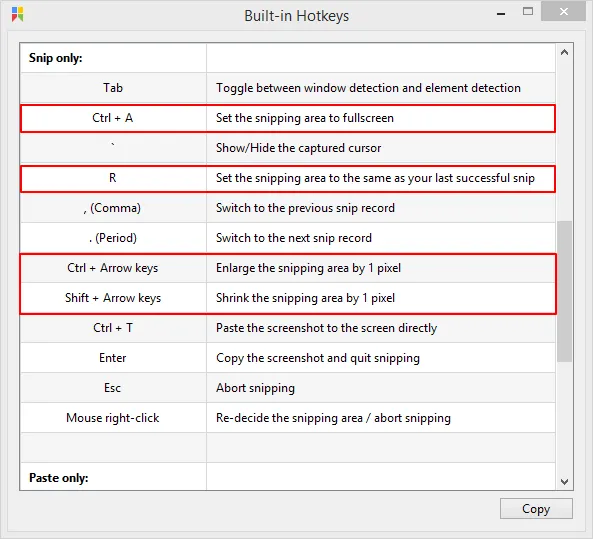
Hot keys make life easier. Pressing the print screen button captures the entire screen by default, but in most cases, you’ll only want to focus on a particular area or a single window. You can set a combination of hot keys in a screenshot tool’s preferences to easily capture particular areas of the screen:
Directing Recipients’ Attention
Don’t make people you send a screenshot to find the button they need to click or the link they need to follow. Highlight and point to the key elements to make it obvious which details are important and require their attention.
However, use it with moderation. Keep in mind that you highlight the elements to elegantly point towards what’s important rather than make them look like signs warning you of danger of death. Try to make your highlights look logical and visually attractive.
For instance, when pointing to a button or a box you want to draw attention to, use a frame or a pointer, just like I’ve done on the screenshots in this post. Don’t use a frame and a pointer at the same time; it makes sense only if the object is really hard to notice. Also make sure all pointers and frames are of uniform size, colour and shape.
Do Not Expose Confidential Data
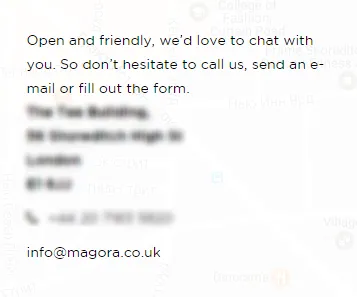
Often, you need to take a screenshot of a page that contains confidential information such as account identifications, income data or personal info. The best way to hide this data is to blur it:
All in all, if you want your screenshots to look great:
- Use a screenshot tool
- Save files as.webp
- Store files on an internal server or computer
- Hide the mouse cursor
- Use hot keys
- Direct the recipient's attention
- Use frames and pointers
- Cut out irrelevant information
- Unify the colour, size and shape of the pointers and frames
- Pay attention to proportion and symmetry
- Blur confidential data
Screenshots should look good no matter whether you’re showing them to your boss, a friend or your blog subscribers. Everyone likes to feel being taken care of, so let’s make life a little more beautiful and intuitive by taking aesthetically pleasing and user-friendly screenshots.


